· Holt Ferris
Setting Up a Fly Tying Desk
I've tied flies on a proper bench, on a card table in a garage, and on a fold-out tray in a drift boat. The station matters less than people think, but the handful of details below make the difference between a session that flows and one where you're fighting your own setup instead of the fly.
Where to clamp your vise
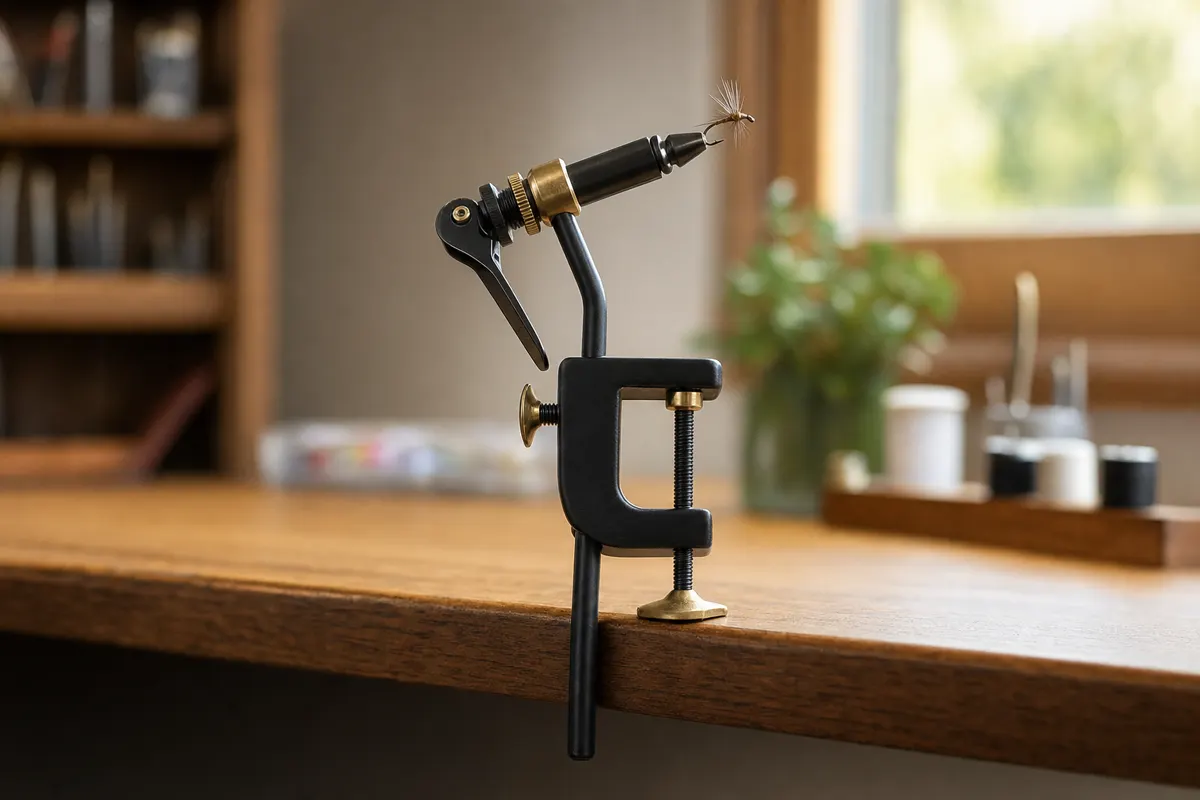
Our rotary fly tying vise mounts with a C-clamp to almost any desk, table, or workbench edge — no drilling, no permanent hardware. Look for an edge that's solid wood or a rigid composite rather than a wobbly folding table leg; the clamp itself will grip fine, but a flimsy table will transmit every hand movement into the fly and make fine wraps harder to control. Clamp near a corner if you can, so you have elbow room on both sides for your bobbin holder and scissors.
Lighting your tying area
Light from behind you casts your own hand's shadow directly over the hook, which is the single most common lighting mistake at a first-time station. Position a lamp to the side of your tying hand, roughly level with the vise jaws, so it lights the fly without your fingers blocking it. A daylight-balanced bulb (rather than a warm yellow one) makes it much easier to judge thread color and material shade accurately, which matters more than it sounds like it should when you're matching a hatch.
Organizing thread, hooks, and materials
The fastest way to slow down a tying session is a messy pile of loose spools and hook packets. A shallow drawer or a small parts organizer with individual compartments keeps hooks sorted by size, and a thread rack — even a simple pegboard with dowels — keeps spools visible and untangled. See our fly tying thread guide for how to organize spools by denier so you're reaching for the right weight without checking labels every time.
| Station element | Minimalist setup | Full station |
|---|---|---|
| Vise mount | C-clamp on any desk edge | Dedicated bench with a fixed clamp spot |
| Lighting | Single desk lamp, side-positioned | Adjustable arm lamp plus ambient room light |
| Thread storage | Small box with a few spools | Wall rack sorted by denier and color |
| Hook storage | Original packets in a drawer | Labeled compartments by size |
| Tools | Bobbin, scissors, whip finisher | Full kit: hackle pliers, brushes, tweezers |
Chair height and posture
Set your chair so your eyes sit roughly level with the vise jaws when you lean in slightly — too low and you'll hunch over the whole session, too high and you'll be squinting down at an angle that hides what's happening on the far side of the hook. This is one place where a rotary vise genuinely helps posture: instead of leaning around the fly to check the back side of a wrap, you spin the fly to you.
Vise arm length that determines how much desk clearance you need
— Tailwater measurements, 2026
With an arm length around 205mm (8.07in), plan for roughly that much clearance between the clamp and any shelf or wall behind it, so the arm can swing freely as you rotate the jaws. If you're tying at a shared table, this arm swing is also the main reason to grab a corner spot rather than a middle seat — you want room to rotate the vise without your elbow bumping into whoever's next to you.
Portable vs. permanent stations
Not everyone has a dedicated tying room, and you don't need one. A C-clamp mount means the whole station can live in a small tote or tackle box between sessions — vise, bobbin, scissors, a small spool case, and a travel lamp if your usual spot doesn't have good lighting. This is genuinely how a lot of tyers work: clamp on, tie for an hour, unclamp, put it all away. A permanent station only starts to pay off once you're tying often enough that setup and teardown time actually adds up, or once your material collection grows past what fits in one small case.
If you do go permanent, think about noise and mess before you pick a spot. Trimming deer hair and chenille sheds fine clippings, and a whip finisher clicking against a hard desktop late at night carries further than you'd expect in a quiet house. A rug or a folded towel under the vise base cuts down on both the mess and the noise, and it's a small thing that makes a shared household a lot more tolerant of a hobby that involves clamping hardware to the furniture.
A simple starter layout
If you're setting up your very first station, don't overbuild it. Clamp the vise to a stable desk edge, position one lamp to the side, keep your first spool of thread and a small handful of hooks within arm's reach, and add organization later as your material collection grows. Our Complete Fly Tying Kit ($79.99) is built around exactly this — the vise plus the core tools you need at a starter desk, without extras you won't use yet. Our Pro Fly Tying Tool Set ($84.99) is the next step up once you know you'll stick with it and want a fuller tool lineup on the desk from day one.
Once the station is set up, the fastest way to get comfortable in it is to actually tie something. Our first fly guide walks through a complete Woolly Bugger from a bare hook, and our beginner patterns guide gives you three more to build confidence at the bench. For the tools themselves — what to expect from a rotary vise's jaws and clamp — our rotary vs. fixed vise guide and how we test page cover the hands-on details, and our reviews page shows how other tyers have set their own stations up around the same vise.